Many people assume there is a standard number of grab bars for every bathroom.
But when looking at how people actually move in a bathroom, it becomes clear that the answer isn’t about a fixed number. It’s about where support is needed most.
Because most slips don’t happen randomly. They happen during specific moments—stepping into a shower, standing up from a toilet, or shifting weight on a wet floor.
That’s why figuring out how many grab bars does a bathroom need is really about understanding those movements, not just counting fixtures.
Disclosure: As an Amazon Associate, I earn from qualifying purchases. This post may contain affiliate links. If you purchase through these links, I may earn a small commission at no extra cost to you. I only recommend products I would feel comfortable using in my own home. Learn more.
Quick Answer: How Many Grab Bars Does a Bathroom Need?
Most bathrooms need 2 to 3 grab bars to provide safe support in key areas such as the shower and toilet.
Typically:
- 1 to 2 grab bars are installed inside the shower or bathtub
- 1 grab bar is placed next to the toilet
The exact number depends on the bathroom layout, the user’s mobility level, and where support is needed during movement—but for most homes, starting with 2 to 3 well-placed grab bars provides effective safety coverage.
Why There’s No “One Number Fits All”
In practical terms, most bathrooms end up with 2 to 3 grab bars placed in high-risk areas, with additional bars added only when needed for specific movements or support.
This is often misunderstood when planning bathroom safety, because people expect a fixed rule instead of thinking about how movement actually works.
A small bathroom with a walk-in shower might only need two well-placed grab bars.
On the other hand, a bathroom with a bathtub, longer walking space, or multiple transitions might need three or four to cover all the key movements safely.
The number changes depending on:
- how the space is laid out
- how far someone needs to move inside the bathroom
- and how much support they need during those movements
This is why the focus should be on where support is needed rather than trying to follow a fixed number.
The 3 Most Important Areas for Grab Bars
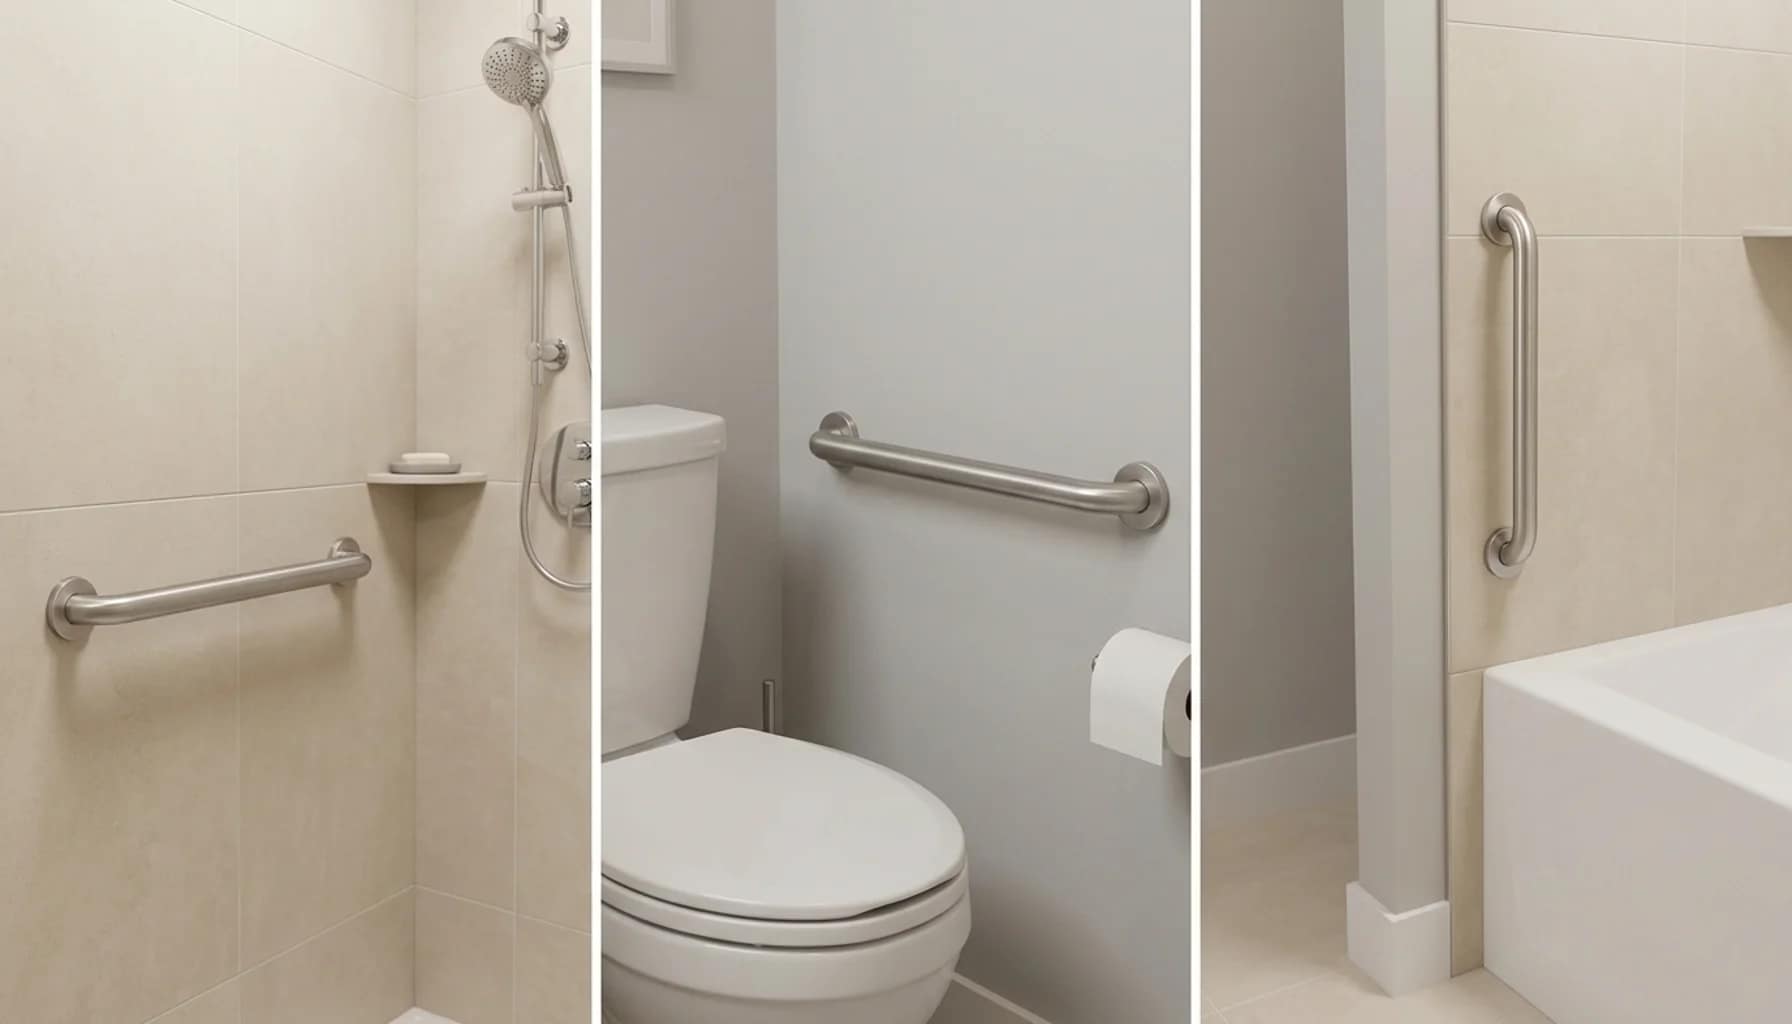
If you are unsure where to start, focus on the highest-risk areas first.
1. Inside the Shower or Bathtub
This is one of the highest-risk areas for slips and loss of balance.
Wet surfaces, soap, and awkward movements (like stepping over a tub edge) create the highest risk.
Ideally, you’d have:
- one horizontal bar along the wall
- one vertical bar near the entry point
This gives support for both entering/exiting and stability while standing.
If you’re planning placement here, it helps to understand where to install grab bars in a bathroom so they align with natural movement.
Next to the Toilet
Standing up from a seated position can be more difficult than people expect.
A grab bar placed beside the toilet provides:
- a stable push point
- better balance during transitions
- more confidence during everyday use
In smaller bathrooms, even one well-placed bar here can make a big difference.
3. Bathroom Entry or Transition Areas
This is often overlooked.
If there’s:
- a small step
- a threshold
- or a slippery surface near the entrance
Adding a grab bar nearby can help prevent slips during movement.
It’s not always necessary—but in some layouts, it adds an extra layer of safety.
This area becomes more important in layouts with thresholds, uneven flooring, or limited space to stabilize before entering the bathroom.
When You Might Need More Grab Bars
In some situations, adding more than the basic 2–3 grab bars makes sense.
Additional grab bars may be needed when daily movement inside the bathroom involves multiple transitions or higher effort.
For example:
- If someone uses a bathtub instead of a walk-in shower, they may need both an entry grab bar and one inside for stability
- In larger bathrooms, there may be longer walking distances where balance support becomes helpful
- If mobility is limited or balance is inconsistent, having additional support points can reduce hesitation and awkward movements
As needs change over time, the number of grab bars often increases gradually. What starts as one or two bars can expand into a more complete setup as safety becomes a bigger priority.
The goal isn’t to overdo it—it’s to make sure there are no “blind spots” where support is needed but missing.
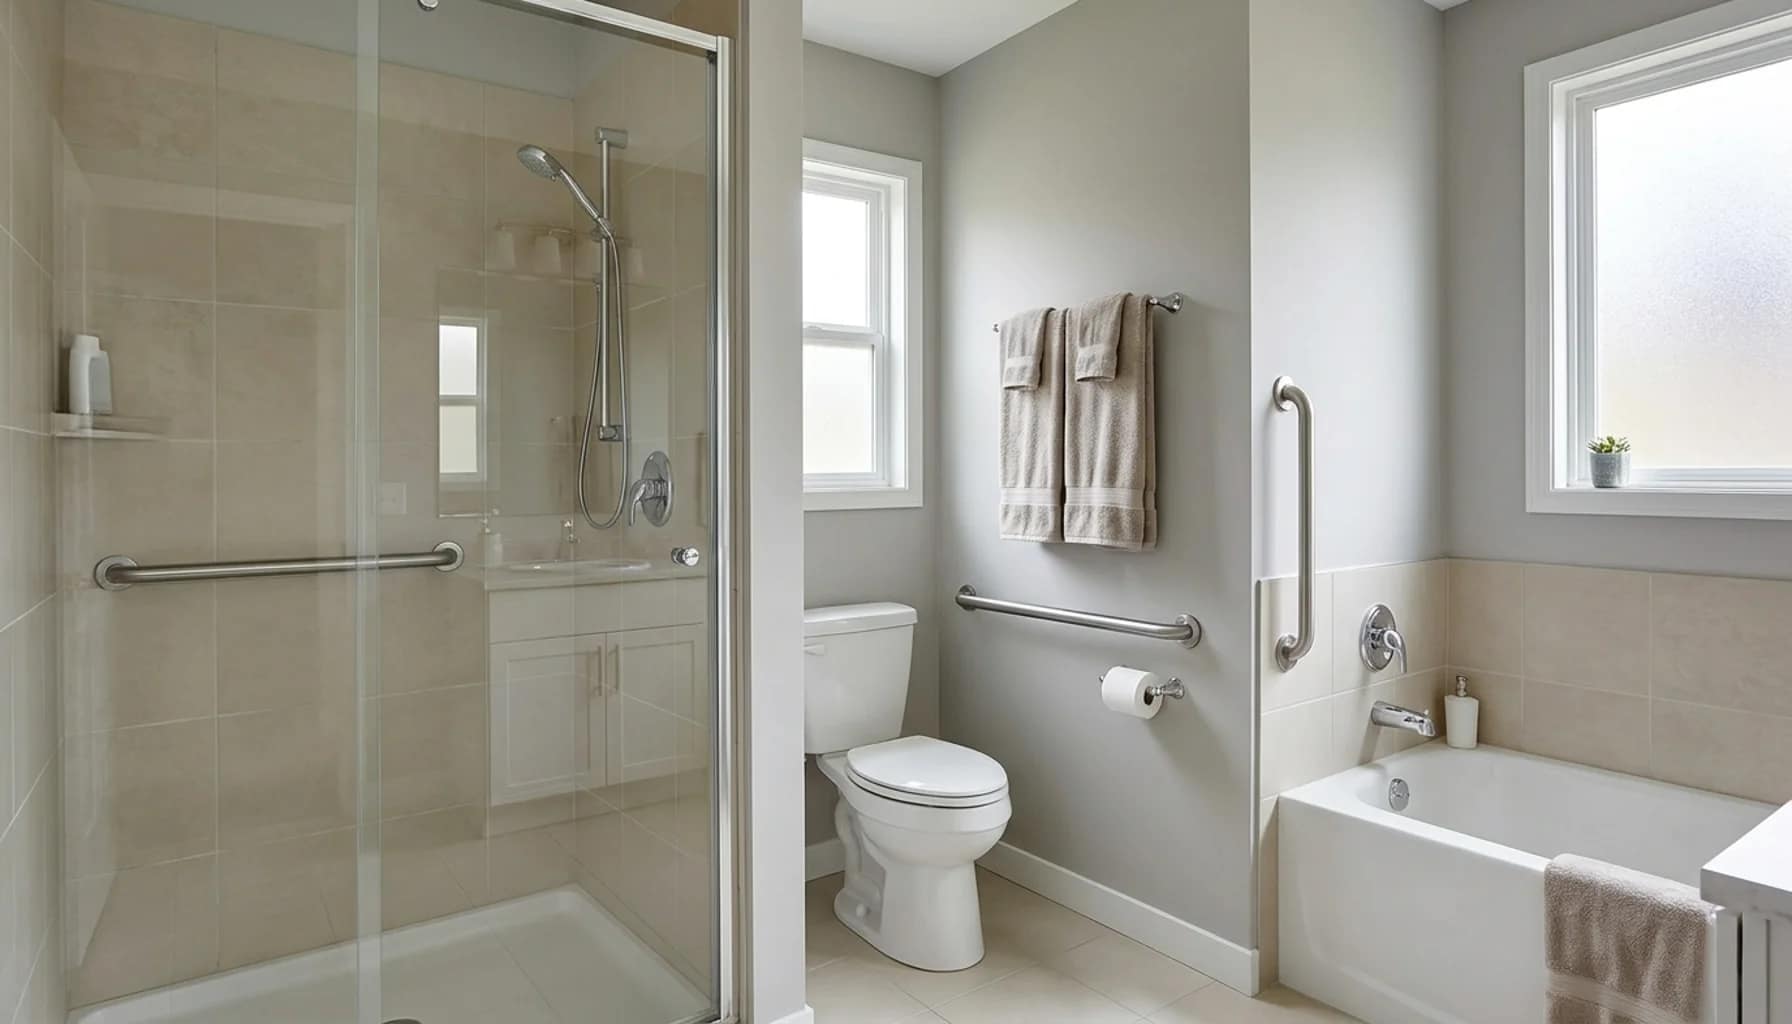
Example Setup: Typical Bathroom Layout
In a typical bathroom setup, the most effective grab bar placement usually follows the main movement path.
- One grab bar inside the shower for standing stability
- One vertical or angled bar near the shower entry for safe transitions
- One grab bar next to the toilet for sitting and standing support
This setup covers the most common risk points without adding unnecessary clutter and reflects how most bathrooms are safely equipped in real-world use.
Additional grab bars are only needed if there are extra movement areas or higher support needs.
How Placement Matters More Than Quantity
This is one of the most important factors to understand.
You can install five grab bars—but if they’re not in the right places, they won’t help much.
On the other hand, two well-placed grab bars can significantly improve safety.
A more effective approach is to think in terms of movement:
- Where does the hand naturally reach?
- Where does balance shift?
- Where is the highest risk of slipping?
If the grab bar is in the right spot, people tend to use it without thinking.
If it’s not, they ignore it—or grab something unsafe instead.
If you’re unsure how to position them correctly, reviewing grab bar placement height guidelines can help ensure proper placement.
Should You Start with Fewer Grab Bars?
In most cases, starting with 2 to 3 grab bars in key areas is more practical and allows you to adjust the setup based on real use.
Instead of installing a lot of grab bars all at once, it usually makes more sense to start with the highest-risk areas and build from there.
Once a grab bar is installed, it often becomes clear whether additional support is needed. People naturally adjust their movement, and you start to notice where additional stability would help.
A simple approach looks like this:
- Install grab bars in the shower and near the toilet
- Use the space for a while
- Pay attention to where balance feels uncertain
- Add more bars only if needed
This keeps the setup practical and avoids turning the bathroom into something that feels overly medical or cluttered.
In many cases, a minimal setup works better than an overbuilt one.
Common Mistakes to Avoid

Several common mistakes can reduce the effectiveness of grab bars if not addressed.
Adding Too Many Grab Bars
More isn’t always better.
Too many bars can make the space feel cluttered and confusing, especially if they’re not placed intentionally.
Placing Bars Without Considering Movement
A grab bar that looks well-positioned might not be useful in real life.
Always think about actual movements—not just wall space.
Ignoring Installation Quality
Even the right number of grab bars won’t help if they’re not installed properly.
Secure installation is what allows a grab bar to handle real pressure. If you’re unsure about that part, it helps to understand how to install grab bars in studs so you know what a safe setup looks like.
Using the Wrong Type of Grab Bar
Not all grab bars serve the same purpose.
Suction grab bars, for example, can help with temporary balance—but they’re not a replacement for properly installed bars.
If you’re unsure about the difference, it’s worth understanding suction vs permanent grab bars before choosing.
What I Recommend
A practical approach is to keep the setup simple and focus on what works in real-life use.
Start with 2–3 grab bars in key locations.
- one inside the shower for stability
- one near the toilet for sitting and standing
- optionally one near an entry or transition if needed
That setup already covers the most common risk areas.
From there, additional grab bars should only be added if there is a clear need, such as longer movement paths or reduced balance.
More importantly, I’d make sure each grab bar is:
- securely installed (ideally into studs)
- placed where the hand naturally reaches
- appropriate in length for the movement it supports
If you get those things right, even a simple setup can feel noticeably safer.
If you are unsure what to look for in a reliable grab bar, reviewing well-rounded grab bars for bathroom safety can help clarify what to prioritize when selecting a dependable option for real-world use.
Final Thoughts
So, how many grab bars does a bathroom need in real life?
For most setups, 2 to 3 well-placed grab bars are enough to significantly improve safety.
However, the most effective setup depends on how the space is used and where support is needed most.
It’s not about adding more—it’s about adding support where it actually matters.
If you focus on movement, placement, and proper installation, even a simple setup can make a big difference.
FAQ
Q: Is one grab bar enough in a bathroom?
A: In most cases, one is not enough. At least two or three are recommended to cover key risk areas like the shower and toilet.
Q: Do you need grab bars in both shower and toilet areas?
A: Yes, these are the two highest-risk areas and should both have support.
Q: Can you have too many grab bars?
A: Yes. Too many can clutter the space and reduce usability if not placed intentionally.
Q: Where should grab bars be placed first?
A: Start with the shower/tub area and next to the toilet, as these are the most common points where support is needed.
Q: Should grab bars be installed into studs?
A: Ideally, yes. This provides the strongest and safest support.