Installing a grab bar sounds simple—until you actually try to do it right.
I remember the first time I looked into it, I thought, “Just drill it into the wall and you’re done.” Turns out, that’s exactly how people end up with loose grab bars that don’t hold when they’re needed most.
If you’re serious about bathroom safety, knowing how to install grab bars in studs is one of the most important things you can learn. A well-installed grab bar can provide real support and stability. A poorly installed one can create a false sense of security.
This guide walks you through the process step by step, so you can install grab bars properly and safely. And if you’re still deciding where grab bars should go, I’ve also covered that in my guide on where to install grab bars in a bathroom.
Disclosure: As an Amazon Associate, I earn from qualifying purchases. This post may contain affiliate links. If you purchase through these links, I may earn a small commission at no extra cost to you. I only recommend products I would feel comfortable using in my own home. Learn more.
Why Installing Grab Bars in Studs Matters
Before getting into the steps, it’s important to understand why installing into studs is such a big deal.
Wall studs are the solid wooden beams behind your drywall or tile. They’re designed to support weight. When you anchor a grab bar into a stud, you’re attaching it to the strongest part of the wall.
That’s what allows the grab bar to support full body weight.
If you skip the studs and rely only on drywall anchors, the grab bar may feel secure at first, but it can fail under pressure. And in a bathroom, that pressure usually comes during a slip—exactly when you need it most.
Many people ask if anchors are enough. In some cases, heavy-duty anchors can work, but installing directly into studs is generally the safest and most reliable option.
If you want a broader view of safety, I recommend reading are grab bars safe for seniors, because installation quality plays a big role in that answer.
Tools and Materials You’ll Need

Before starting, it helps to have everything ready.
Here’s what I typically use:
- Stud finder
- Drill (with appropriate drill bits)
- Screws (usually included with grab bars)
- Level
- Measuring tape
- Pencil for marking
- Safety glasses
If you’re working with tile, you’ll also need a drill bit designed for tile or masonry.
Having the right tools makes the process smoother and reduces the chance of mistakes.
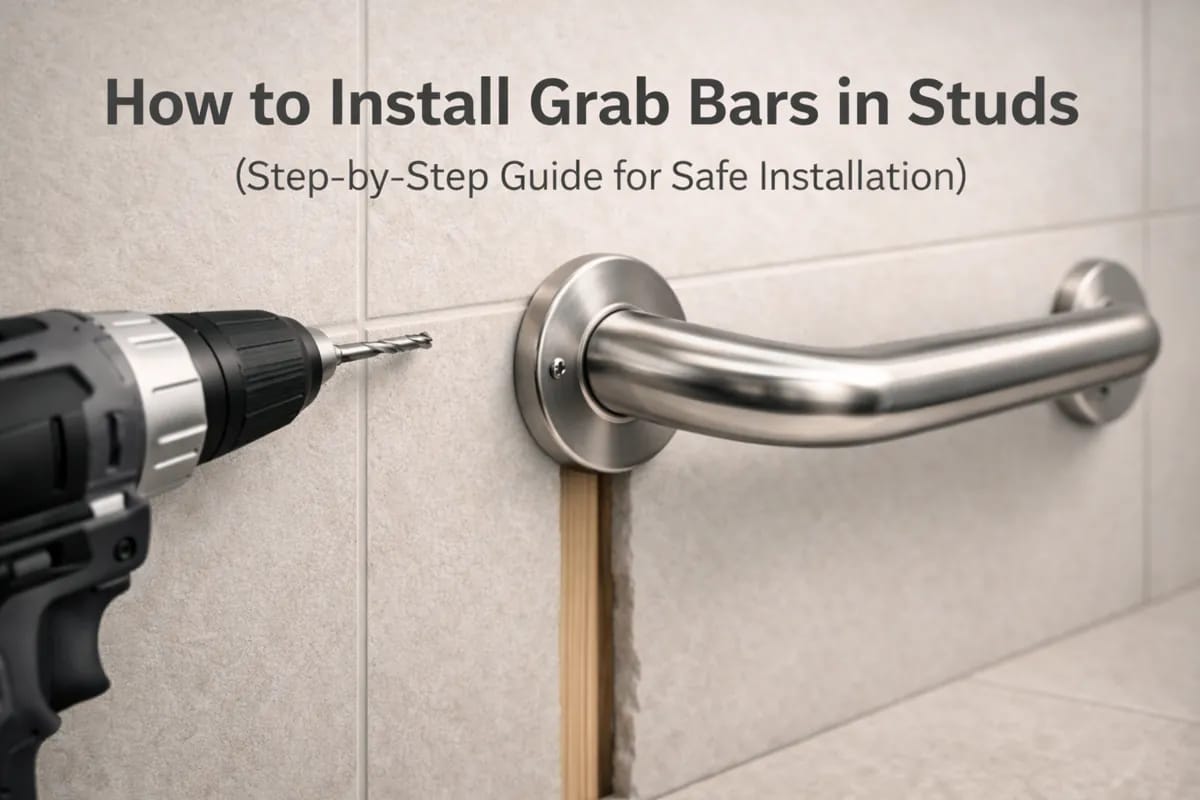
Step-by-Step: How to Install Grab Bars in Studs

Step 1: Locate the Studs
This is the most important step.
Use a stud finder to locate the studs behind the wall. Move it slowly across the surface until it indicates a stud. Mark the edges and find the center.
If you don’t fully trust the stud finder, you can double-check by lightly drilling a small pilot hole.
Most studs are spaced 16 inches apart, which can help you predict where the next one will be.
Step 2: Mark the Placement
Once you’ve found the stud, hold the grab bar in position and mark the mounting holes.
Make sure the bar is level. Even a slight angle can feel awkward when using it.
This is also a good time to double-check placement based on actual use. Think about how the person will grab the bar—standing, stepping, or turning.
Step 3: Drill Pilot Holes
Drill pilot holes into the stud where you marked the mounting points.
This makes it easier to insert screws and helps prevent the wood from splitting.
If you’re drilling through tile, go slowly and use the correct drill bit. Rushing this step can crack the tile, which is much harder to fix.
Understanding installing grab bars on tile walls can help you avoid common issues and ensure a safer installation.
Step 4: Attach the Grab Bar
Align the grab bar with the pilot holes and insert the screws.
Tighten them firmly, but avoid over-tightening, which can damage the mounting hardware or strip the screws.
Make sure the bar sits flush against the wall with no gaps.
Step 5: Test for Stability
Before using the grab bar, test it.
Apply pressure in different directions—pulling, pushing, and downward force.
A properly installed grab bar should feel completely solid, with no movement.
Proper installation is what allows a grab bar to handle real pressure, and knowing how much weight grab bars can hold makes it easier to understand why mounting into studs is so important.
What If Studs Don’t Line Up?
This is a common situation.
Sometimes the ideal grab bar placement doesn’t match where the studs are located.
In those cases, you have a few options:
- Adjust the placement slightly to hit a stud
- Use a longer grab bar to reach between studs
- Use heavy-duty anchors designed for grab bars
While anchors can work, they’re generally not as strong as direct stud mounting. If possible, prioritize hitting at least one stud.
Common Installation Mistakes to Avoid
There are a few mistakes I see often when people install grab bars.
One is skipping the stud entirely and relying on drywall anchors. This is one of the biggest safety risks.
Another is placing the grab bar without considering actual usage. A bar that’s too far away or too high won’t be used effectively.
Drilling too quickly through tile is another issue. It can cause cracks that are difficult to repair.
Also, not testing the grab bar after installation is a mistake. You want to be sure it’s secure before relying on it.
Avoiding these mistakes makes a big difference in how safe and reliable the grab bar will be.
How This Fits Into Overall Bathroom Safety
Installing grab bars correctly is just one part of creating a safer bathroom.
Placement, height, and product choice all work together.
If you want to see how everything connects, I’ve covered that in my guide on grab bars for bathroom safety, where I break down the full setup.
Once you understand both installation and placement, you’re in a much better position to create a setup that actually works.
Final Thoughts
Learning how to install grab bars in studs isn’t complicated, but it does require attention to detail.
The key is making sure the grab bar is anchored into something solid, placed where it’s actually needed, and installed correctly.
Taking the time to do it right can make a real difference in everyday safety.
FAQ
Q: Can you install grab bars without studs?
A: Yes, using heavy-duty anchors, but installing into studs is generally safer.
Q: How do I find studs in a bathroom wall?
A: Use a stud finder or look for consistent spacing (usually 16 inches apart).
Q: What screws should I use for grab bars?
A: Most grab bars come with appropriate screws, but they should be suitable for wood studs.
Q: Can grab bars be installed on tile?
A: Yes, but you need the correct drill bit and should drill slowly to avoid cracking.
Q: How do I know if the grab bar is secure?
A: Test it by applying pressure in multiple directions before using it.